如何调试
vscode 调试c++
前提条件
-
已经安装 vscode 官方 c++ 插件.
-
linux系统
-
linux已经 安装 g++
-
新建立一个code2文件夹,
        1
2
3

        cd ~
mkdir code2
并用vscode打开这个文件夹
- 创建一个文件
1.cpp,写如如下代码
        1
2
3
4
5
6
7
8
9
10
11
12

        #include <iostream>
using namespace std;

int main()
{
    int a = 1;
    int b = 2;
    int c = a + b;
    cout << c << endl;
    return 0;
}
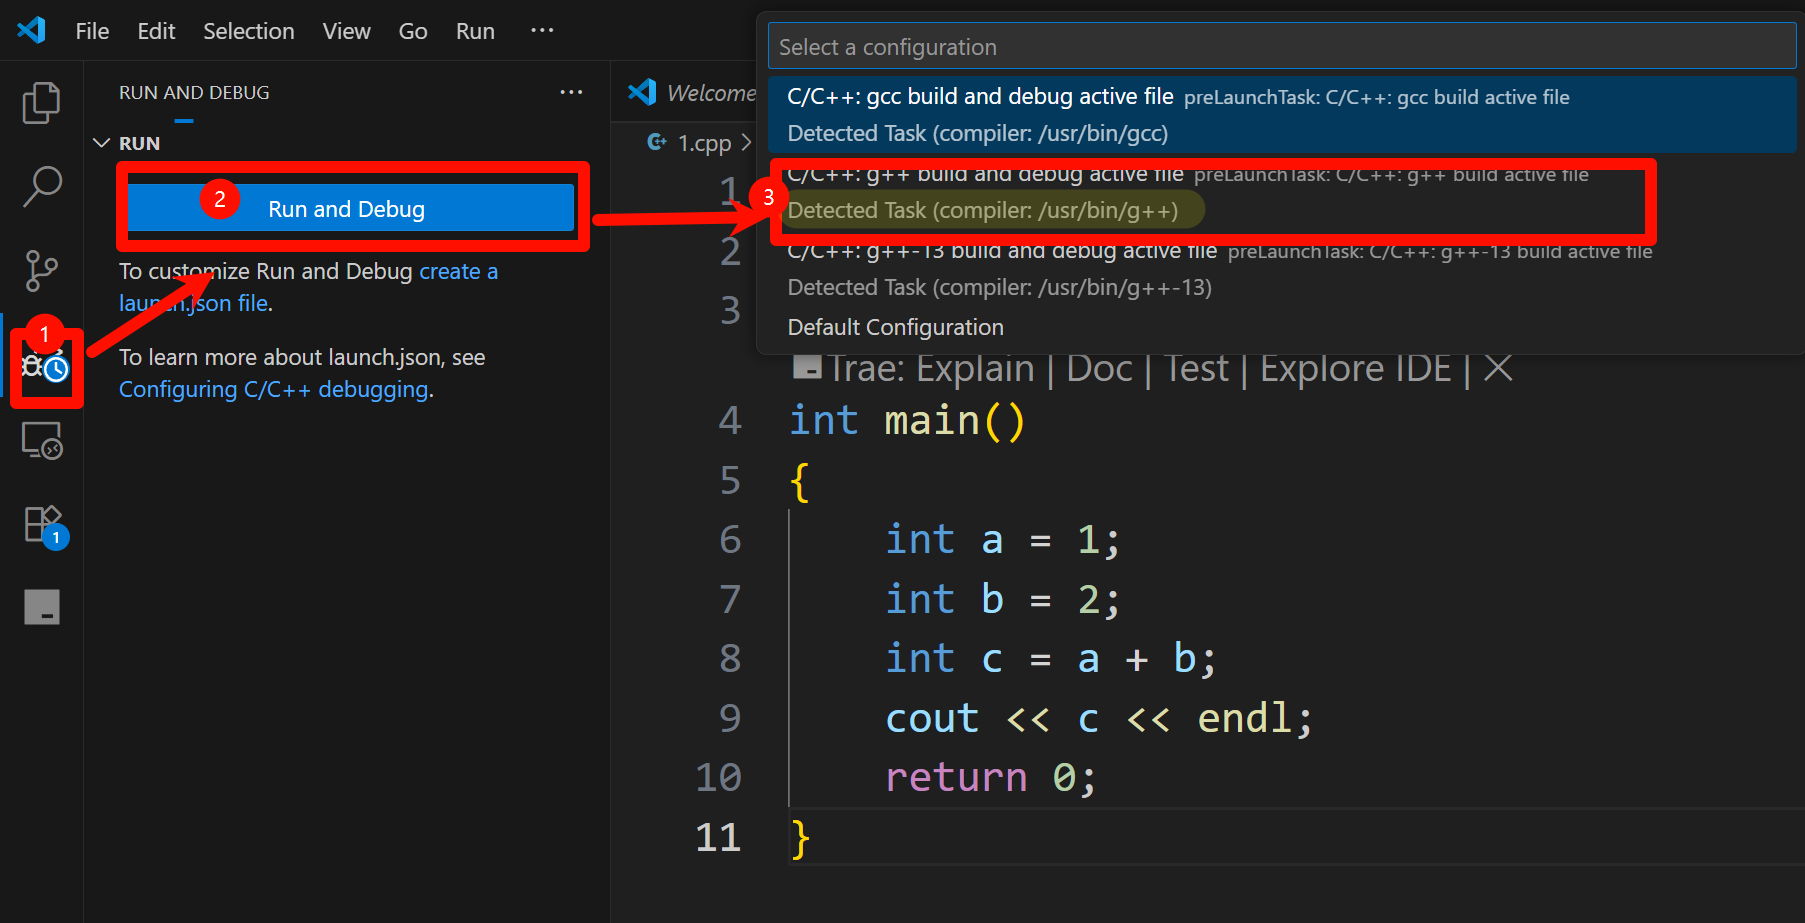
- 点击run and debug 按钮
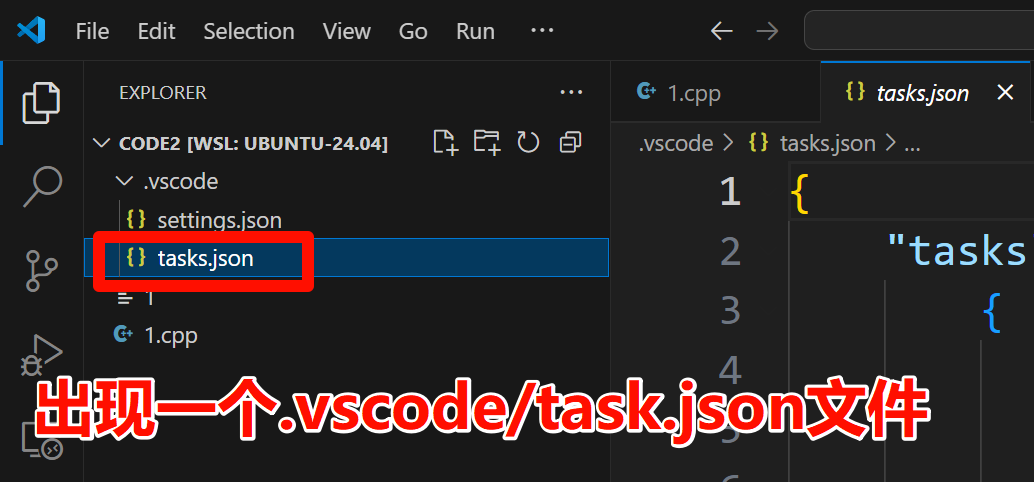
出现一个.vscode/tasks.json 文件
{
    "tasks": [
        {
            "type": "cppbuild",
            "label": "C/C++: g++ build active file",//注意这里
            "command": "/usr/bin/g++",
            "args": [
                "-fdiagnostics-color=always",
                "-g",
                "${file}",
                "-o",
                "${fileDirname}/${fileBasenameNoExtension}"
            ],
            "options": {
                "cwd": "${fileDirname}"
            },
            "problemMatcher": [
                "$gcc"
            ],
            "group": {
                "kind": "build",
                "isDefault": true
            },
            "detail": "Task generated by Debugger."
        }
    ],
    "version": "2.0.0"
}
- 下断点
如何读取in文件
修改1.cpp如下
        1
2
3
4
5
6
7
8
9
10
11
12

        #include <iostream>
using namespace std;

int main()
{
    int a,b;
    cin >>a >>b;
    int c = a + b;
    cout << c << endl;
    return 0;
}
1.cpp同目录下面创建一个in.txt,如下
12 14
要把 in.txt 作为标准输入喂给调试/运行的程序,有两种常见做法:
-
终端里手动重定向(最简单):
bashcopy1
2./1 < in.txt但无法在 VS Code 的 F5 调试里直接用。
-
让 debugger/启动器帮你重定向:
在 launch.json 里加一行"args":[],但把输入玩转需要用到"redirectOutput" + "console",或者直接 外部终端。更简单的是直接配置运行时参数实现重定向。
快速方案:把下面内容贴到你的 .vscode/launch.json 里(没有就新建)。核心是 "externalConsole": true + "args": [ "<", "in.txt" ],先调用 shell 实现重定向:
{
    "version": "0.2.0",
    "configurations": [
        {
            "name": "g++ build & debug cpp",
            "type": "cppdbg",
            "request": "launch",
            "program": "${fileDirname}/${fileBasenameNoExtension}",
            "args": ["<", "${workspaceFolder}/in.txt"],
            "stopAtEntry": true, // 自动breakpoint在main的第一行
            "cwd": "${fileDirname}",
            "environment": [],
            "externalConsole": false,        // 弹一个外部终端,shell 会解析 <
            "MIMode": "gdb",
            "setupCommands": [],
            "preLaunchTask": "C/C++: g++ build active file"   // 与你的 task.json label 保持一致
        }
    ]
}
Warning
- 在同1.cpp 同目录下面创建一个in.txt 文件
- “preLaunchTask”: “C/C++: g++ build active file”
preLaunchTask 里面的内容 与你的 task.json label 保持一致
用法:
- 把
in.txt放在项目根目录里。 - 打开
1.cpp,按 F5 调试。程序会自动编译,然后在弹出的小终端里从in.txt读入。
如果你 不想弹外部黑框,也可以把 externalConsole 设为 false,然后把 "args" 改为空数组,再在 Program arguments 输入框里 手动输入 < in.txt(新版 VS Code UI 会在启动调试序列时把整条命令传给集成终端,所以也能正确重定向,但旧版不一定)。
launch.json 与 tasks.json 有什么区别?
一句话总结
• tasks.json:告诉 VS Code “怎么编译/构建/预处理” 你的代码。
• launch.json:告诉 VS Code “怎么运行/调试” 已经生成的二进制。
两者各司其职,也可以配合使用。
| 对比维度 | tasks.json | launch.json |
|---|---|---|
| 目的 | 提供“任务”:编译、清理、打包、单元测试等 | 提供“调试配置”:启动程序并附加调试器 |
| 触发方式 | 手动(Ctrl + Shift + P → Run Task)或 VS Code 在后台调用 | 调试启动(F5 或点击 Run & Debug) |
| 典型指令 | g++ -g main.cpp -o main |
gdb ./main |
| 关键字段 | label command args group |
program args cwd MIMode preLaunchTask |
| 是否必须 | 不必须(没有它仍可 CLI 编译) | 若想用 VS Code 调试就必须有 |
| 能否串联 | 可以!launch.json 里可以指定 preLaunchTask 字段,让调试前先跑某个任务(如编译) |
不能反向调用 |
示例
// tasks.json
{
    "label": "build",
    "command": "g++",
    "args": ["-g", "main.cpp", "-o", "main"]
}
// launch.json
{
    "program": "${workspaceFolder}/main",
    "preLaunchTask": "build",
    "miDebuggerPath": "gdb"
}
流程
按下 F5 → VS Code 先用 tasks.json 里名为 build 的任务编译 → 生成 ./main → 再按 launch.json 的规则启动 gdb 调试。